
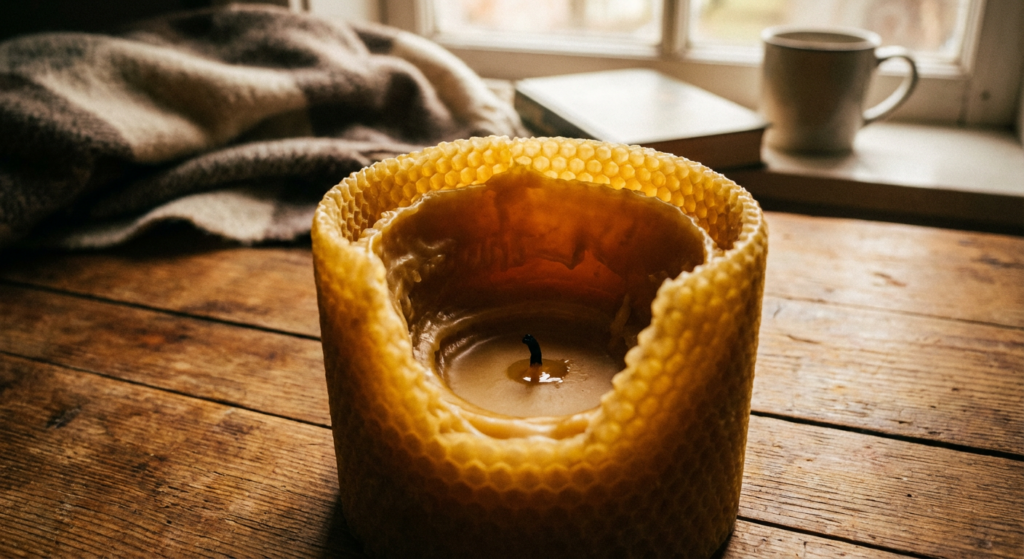
If you’ve ever watched your beautiful beeswax candle burn straight down the middle, leaving a wall of untouched wax around the edges, you’re not alone. Candle tunnelling is a common frustration, especially for those who value a clean, even burn. The good news? With a little know-how, you can fix tunnelling and enjoy every last drop of your natural beeswax candle.
What Usually Causes the Problem
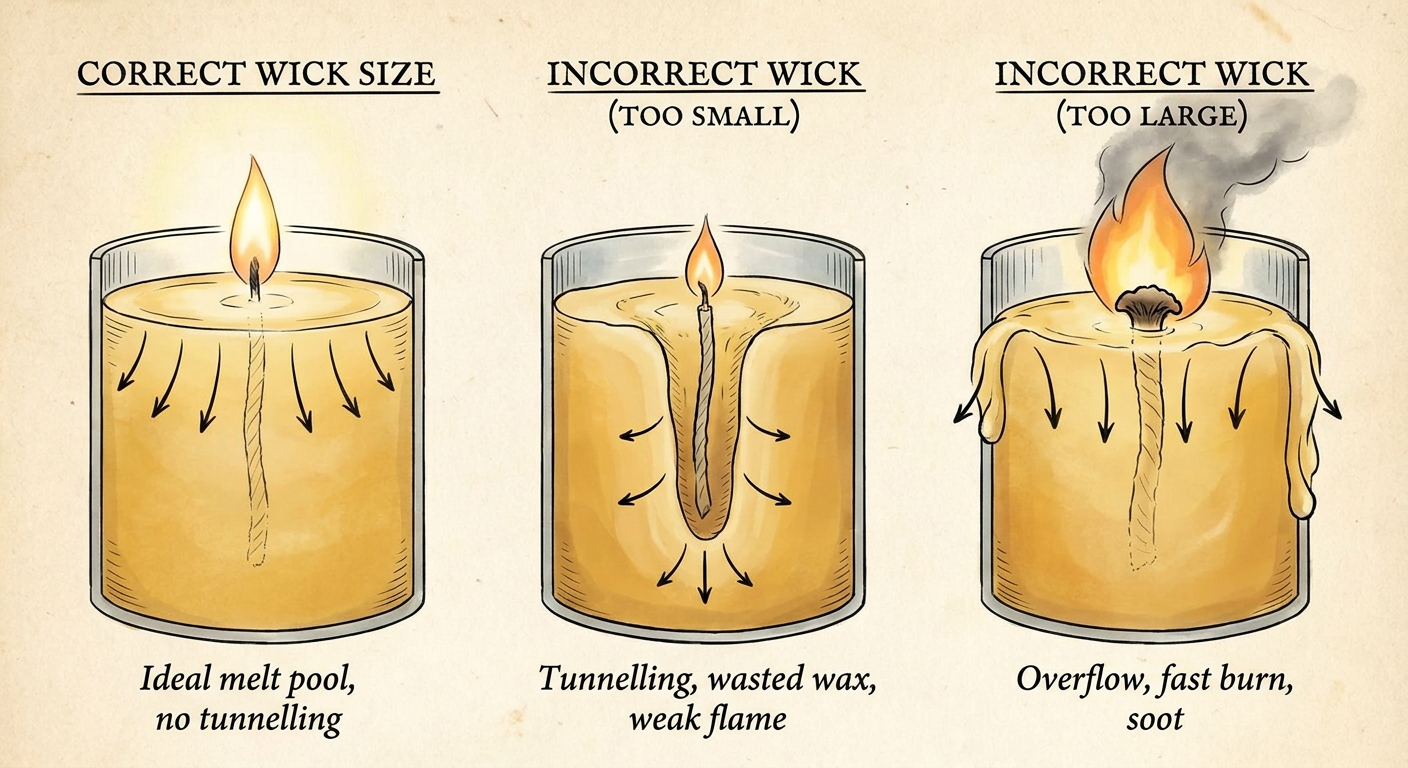
Beeswax candle tunnelling happens when the wax melts unevenly, creating a narrow tunnel down the centre while leaving the outer edges untouched. This issue is surprisingly common, even among seasoned candle lovers, and it’s almost always fixable. The most frequent cause is an incorrect wick size—if the wick is too small for the candle’s diameter, it simply can’t generate enough heat to melt the wax all the way to the edges. This is especially true for natural beeswax, which has a higher melting point than other waxes.
Another major culprit is not letting your candle burn long enough during its first use. The initial burn is crucial: if you extinguish the candle before the entire surface has melted, a memory ring forms. Each subsequent burn will only melt as far as that first ring, causing the tunnel to deepen with every use. Many eco-conscious consumers, eager to preserve their candles, mistakenly cut burns short, not realising this sets the stage for tunnelling.
Environmental factors also play a role. Drafts, uneven surfaces, or burning your candle in a cold room can cause the wax to melt unevenly. Even the vessel’s shape matters—a tall, narrow jar is more likely to tunnel than a wide, shallow one. By understanding these common causes, you can feel reassured: tunnelling isn’t a sign of a poor-quality candle, but rather a fixable part of the candle-burning journey.
How to Fix It Step by Step

Fixing beeswax candle tunnelling is easier than you might think, and you don’t need any special tools. Start by assessing how to trim candle wicks properly deep the tunnel is. If the tunnelling is minor and there’s still a good amount of wax around the edges, you can often correct it with a simple trick: the aluminium foil method. Wrap a collar of foil around the top of the candle, leaving an opening above the wick. Light the candle and let it burn for an hour or two. The foil traps heat, encouraging the outer wax to melt and catch up with the centre.
If the tunnel is more pronounced, or if you want a quicker fix, try using a hairdryer or heat gun. On a low setting, gently warm the top layer of wax until it softens and levels out. Be careful not to overheat or blow wax onto the wick. Once the surface is even, allow the candle to cool and reset before relighting. This method is especially helpful for those who want to restore a candle for meditation or yoga sessions without waiting for hours.
After fixing the tunnel, always trim the wick to about 5mm before relighting. This ensures a steady, even flame and prevents future issues. Monitor the next burn closely—let the candle burn long enough for the entire surface to melt, usually one hour for every 2.5cm of diameter. By following these steps, you’ll revive your beeswax candle and enjoy its warm, golden glow as intended.
When the Problem Means You Need a Better Candle or Setup
Sometimes, persistent tunnelling is a sign that your candle or setup isn’t quite right for your needs. If you’ve tried the fixes above and still find your beeswax candle buying guide candle tunnelling after every burn, it may be time to consider an upgrade. Candles with poorly matched wicks, low-quality beeswax blends, or unsuitable containers can be difficult to salvage, no matter how careful you are. Upgrading to a candle made with pure beeswax and a properly sized, natural fibre wick can make all the difference, especially for those who use candles regularly for relaxation or self-care rituals.
When choosing a new beeswax candle, look for brands that prioritise wick size and vessel shape, and offer guidance on burn times. A wider candle with a robust cotton or wood wick will burn more evenly and last longer. If you’re passionate about sustainability, seek out candles poured in reusable or recyclable containers. Investing in a higher-quality beeswax candle not only prevents tunnelling but also enhances your overall experience—filling your space with a clean, natural scent and a steady, calming flame.
How to Prevent the Problem Next Time
Preventing beeswax candle tunnelling is all about mindful burning and a bit of preparation. The most important tip is to let your candle burn long enough on the first use. Aim for a full melt pool that reaches the edges of the vessel—this typically takes one hour per 2.5cm of candle diameter. This initial investment of time sets the memory for all future burns, ensuring the wax melts evenly every time. For those who use candles during yoga or meditation, plan your sessions so you can enjoy a complete, uninterrupted burn.
Regular maintenance also goes a long way. Always trim the wick to about 5mm before lighting, and keep your candle away from drafts or cold surfaces. Store beeswax candles in a cool, dry place to prevent warping or sweating. If you notice the flame flickering or leaning, reposition the candle to a more stable spot. By adopting these best practices, you’ll extend the life of your beeswax candles and enjoy a consistently beautiful, even burn—perfect for creating a peaceful, eco-friendly candle care tips atmosphere at home.
Frequently Asked Questions
Why does my beeswax candle tunnel even with a long burn?
If your beeswax candle tunnels despite long burns, it’s likely due to an undersized wick or a vessel that’s too wide for the wick’s heat output. Beeswax requires a robust wick to melt evenly, so consider upgrading to a candle with a thicker, natural fibre wick for better results.
Can I fix tunnelling in a candle that’s already halfway burned?
Yes, you can still fix tunnelling in a partially used candle. Try the aluminium foil method or gently warm the surface with a hairdryer to even out the wax. Just be sure to trim the wick and allow the candle to reset before relighting.
Is tunnelling more common with beeswax than other waxes?
Tunnelling can occur with any candle, but beeswax’s higher melting point makes it more susceptible if the wick isn’t properly sized. Choosing high-quality, well-crafted beeswax candles reduces the risk significantly.
How long should I burn my beeswax candle to avoid tunnelling?
For best results, burn your beeswax candle for one hour per 2.5cm of diameter during the first use. This ensures a full melt pool and prevents memory rings that cause tunnelling.
What should I do if my candle keeps tunnelling after trying these fixes?
If tunnelling persists, it may be time to try a different candle or brand. Look for candles with wider diameters, thicker wicks, and pure beeswax for a more even burn.
Tunnelling doesn’t have to spell the end for your favourite beeswax candle. With a few simple fixes and mindful burning habits, you can restore and prevent tunnelling, making the most of every candle you light. Remember, a little attention at the start goes a long way towards a cleaner, longer-lasting burn.